Preserve Your Local Harvest
UW Extension Resources | Other Resources | Adjust for Altitude | Canning FAQs | Freezing and Drying Herbs | Storing Fresh Produce
University of Wyoming Extension Resources |
|||
 |
 |
 |
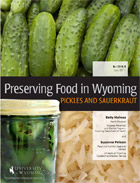 |
| Fruit | Jams and Jellies | Meats | Pickles and Sauerkraut |
 |
 |
 |
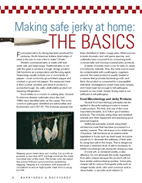 |
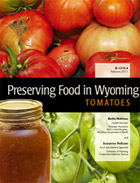
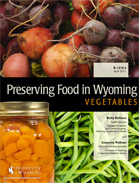
| Tomatoes | Vegetables | Wild Berries | Jerky |
Other Resources |
|||
 |
 |
 |
 |
| Canner's Corner Series | National Center for Home Food Preservation |
USDA Complete Guide to Home Canning |
FreshPreserving.com |
Don't forget to adjust recipes for altitude!!
• Water bath canning:
-If recipe calls for 20 minutes or less processing, increase the processing time by 1 minute for each 1,000 ft above sea level
-If recipe calls for greater than 20 minutes processing, increase the processing time by 2 minutes for each 1,000 feet above sea level• Pressure canning:
-At sea level use 10 psi
-Increase psi by 1/2 lb for every 1,000 feet above sea level
-If using a weighted gauge canner use the 15 lb. weight for all altitudes above 1,000 feet
Canning FAQs
Q. What is wrong with the open kettle method?
A. In this method, food is cooked in an ordinary kettle, then packed into hot jars and sealed without processing. Temperatures in open kettle canning may not be high enough to destroy spoilage organisms that may be in food. Spoilage bacteria may also enter the food while being transferred from kettle to jar. This method is not recommended.
Q. Is steam canning as effective as water bath canning?
A. Research shows that steam canners do not heat as evenly as water bath canning and thus do not heat to as high of a temperature. This results in less bacteria being killed in the processing. The use of steam canners for home canning is not recommended.
Q. If the jar seals, am I assured the food will be safe to eat?
A. No. It takes a lot less heat to seal the lid than to properly process the contents of the jar. If you followed directions correctly, you can be sure the food will keep and be safe to eat. That is why it is very important to select the correct method and follow directions carefully.
Q. Can low-acid food be reprocessed if it was incorrectly processed or if lids failed to seal?
A. If less than 24 hours have gone by since the food was processed, do one of the following:
1. Refrigerate the food and use it in the next day or two.
2. Freeze the food. Drain vegetables before freezing.
3. Reprocess the food. Use the same jars (check jar rim and headspace) or put in clean hot jar. Use new lids and process again for the full time. The quality of twice-processed food will be poor.
Q. How long may canned foods be stored?
A. The recommended storage time for home-canned foods is one year. However, a period of two to three years is considered a reasonable storage time. With longer storage, the eating quality and nutrient content of the food will drop.
Q. Why is it necessary to process jellies, conserves, preserves, and marmalades?
A. Mold and other spoilage microorganisms can grow if the jar is not properly processed and sealed tightly to exclude air. Water bath processing produces a strong vacuum seal.
Freezing and Drying Herbs
Enjoy the taste of fresh herbs all year long by freezing for later use. Cut the herbs just before the flowers open. At this point, the herb's flavorful oils are most concentrated in the leaves, and you can maintain much of that flavor with proper storage.
Four Freezing Techniques:
Option #1: Wash herbs, drain, and pat dry with clean towels. Wrap herbs in freezer paper and then place in a freezer bag. Seal, label, and freeze.
Option #2: Wash herbs and cut into tiny pieces. Fill sections of an ice cube tray* about half full with herbs. Cover herbs with fresh water and freeze until solid. Place frozen cubes in a freezer bag. Seal, label, and place in freezer. When cooking, drop frozen cubes into soups, stews, and sauces.
Option #3: Wash herbs and puree in a blender with a small amount of water. Pour into ice cube trays* and freeze until solid. Transfer cubes to a freezer bag, and seal, label, and freeze. Add cubes to foods, as desired, during cooking.
*Note: Herbs may stain plastic ice cube trays.
Option #4: Wash herbs and puree in a blender with a small amount of water (or oil). Freeze thin flat sheets in small freezer bags. This allows you to just break off as much as is needed and put the rest back in the freezer.
Four Drying Techniques:
Option #1: Tie stems together at the cut ends to make small bundles. Hang bundles upside down in an airy, well-ventilated, darkened area, away from direct sunlight. Strip the leaves when they are crispy dry and crumbly, and store n clean airtight jars. Note: Making the bundles relatively small encourages air circulation and helps prevent molding.
Option #2: Strip the leaves from the stems and then lay the leaves flat on screens in an airy, well-ventilated, darkened area, away from direct sunlight. Store in clean airtight jars after the leaves are crispy dry and crumbly.
Option #3: Similar to option #2, but dry overnight in an oven. Many ovens do not need to be heated: The oven light of an electric range or the pilot light of a gas range furnishes enough heat for overnight drying. Remove leaves from the stems and lay the leaves on a pan or cookie sheet, without allowing the leaves to touch. Once dry, store in clean airtight jars. Leaves generally dry flat and retain good color.
Option #4: Wash the herbs. Use a commercial food dehydrator or microwave. With a commercial dehydrator, follow manufacturer's directions. With a microwave, watch carefully; heat for 30 seconds at a time - between paper towels - until dry. Store in clean airtight jars.
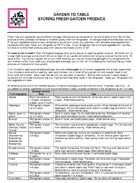
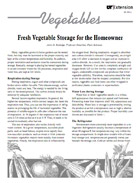
Storing Fresh Produce
The flavors of fruits and vegetables and their nutrient value are best preserved through proper storage. In general this requires cool to cold temperatures and moist to very moist humidity conditions.
Tips:
Store fruits (especially apples, cantaloupes, pears, and peaches) separate from vegetables in the refrigerator. These fruits naturally produce high levels of ethylene gases, which speed ripening.
Try to use damaged produce quickly as their storage life will be shorter.
Do not seal produce in plastic storage bags. Openings or small perforations in the bags will allow air to circulate around the produce, which will help keep it fresh longer.
Keep all storage areas clean, and check produce regularly for signs of spoilage such as mold or slime. If spoiled, toss it out - or better yet, compost it!
Store all cut, peeled, or cooked produce in clean, covered containers in the refrigerator.
Store produce that doesn't require refrigeration in a dark environment with sufficient air circulation
Resources